OCTOBER 2017
BLOCK OF THE MONTH
Hi Everyone - a printable copy of these instructions is available via link on the Empire Quilter's Home Page.
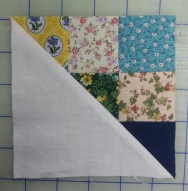
Instructions for a 10-1/2" finished Pinwheel Block - courtesy of Tina B and Karen B - Thanks Ladies
Cut two 6-1/8" squares in white
Cut two 6-1/8" squares in Red

Place one of each colored squares right sides together and draw a line from one corner to the opposite corner. Repeat for the second set of squares

You can either draw a 1/4" line on either side of the center line or you can use a 1/4" foot to guide you

Sew 1/4" from the center line on each side of the line

Cut along the center line and press to the dark side of the square


Trim the ends that are sticking out

Sew together two sets of squares and repeat for the other two. Iron the seams open and sew both sets together


Trim to 10-1/2"

Here is the finished Pinwheel Block in Red and White

Why not make two? One for the Block of the Month and one for yourself? This year we are going to feature 10-1/2" Blocks where possible